


Obsidian has emerged as a powerful and flexible knowledge management tool, despite NOT being an open source product.
Using plugins is just one of the many tips that you can follow to get the most out of Obsidian.
However, there is a small catch when it comes to compatibility. If you have used several Obsidian-specific plugins, then your notes may not be fully compatible in other plain markdown editors.
In this article, we will take a look at Plugins in Obsidian, how you can install it, and also some essential plugins that can make your learning more effective.
But first, a quick heads-up: Obsidian offers two types of plugins:
- Core Plugins: These are officially developed and maintained by the Obsidian team. While limited in number, they are stable and deeply integrated.
- Community Plugins: Created by users in the Obsidian community, these plugins offer a wide variety of features, although they aren’t officially supported by the core team.
Using the core plugins
Core plugins are officially built by Obsidian. They will come pre-installed. So, naturally, that is the recommended method of installation when it comes to plugins.
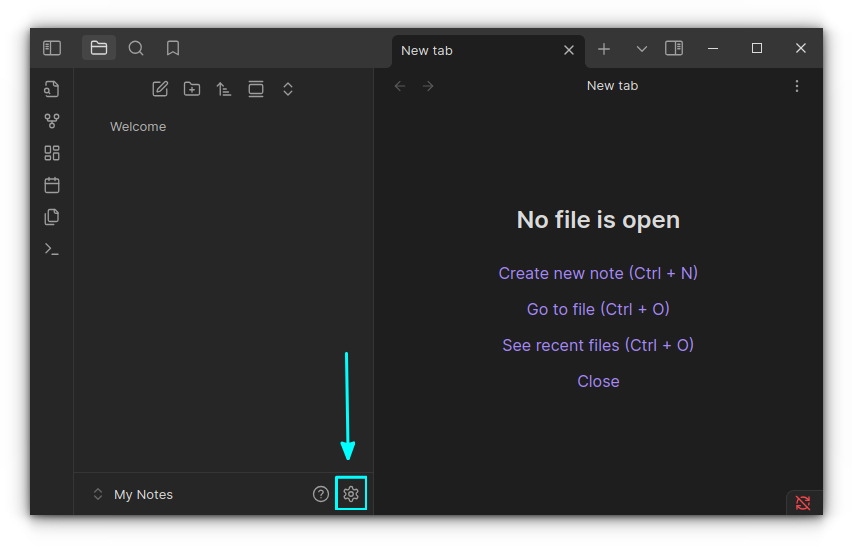
Core plugins are displayed in Obsidian settings page. Click on the settings gear icon at the bottom of the Obsidian app window to go to the settings.
In the settings, select Core Plugins to view the Core plugins.
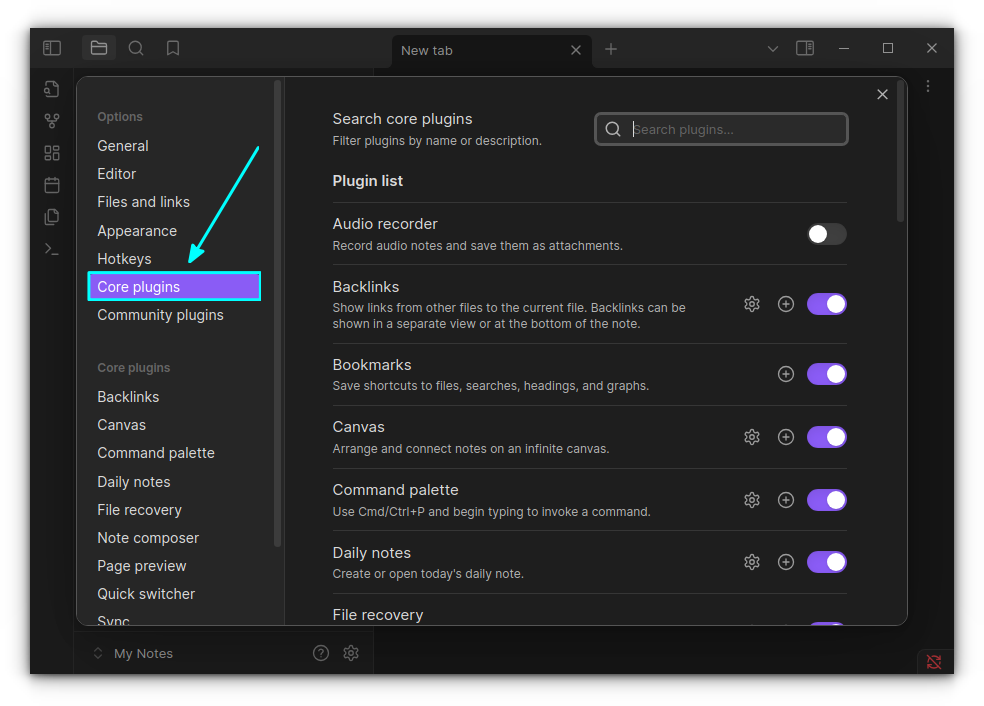
Most of the core plugins are enabled when you install the Obsidian app. But some plugins will be disabled by default.
I have included a brief description under each plugin to know what the plugin does and enable/disable as needed.
Suggested Read 📖

Using the community plugins
I’ve found that community plugins are one of the best ways to boost Obsidian’s capabilities. There’s a massive collection to choose from, and at the time of writing this, there are 2,430 community plugins available for installation.
These plugins are built by third-party developers and go through an initial review process before being listed.
However, since they have the same level of access as Obsidian itself, it’s important to be cautious. If privacy and security are essential for your work, I suggest doing a bit of homework before installing any plugin, just to be safe.
Disable the restricted mode
To protect you from unofficial plugins, Obsidian starts with a restricted mode, where the community plugins are disabled. To install community plugins, you need to disable the restricted mode first, just like the auto blocker in some Android phones to block app installations from unauthorized sources.
Go to the Obsidian settings and select the Community Plugins option. Here, click on the “Turn on community plugins” button.
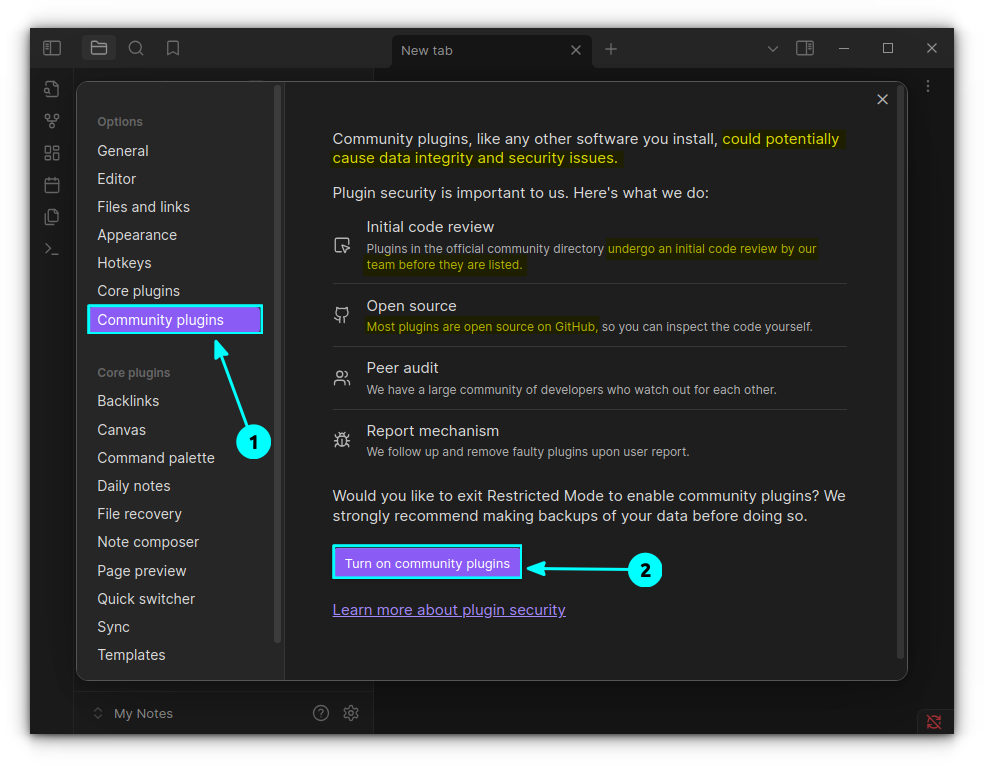
This will disable the restricted mode. And, you are all set! 😄
Install community plugins
Once the restricted mode is disabled, you can browse for community plugins and get them installed.
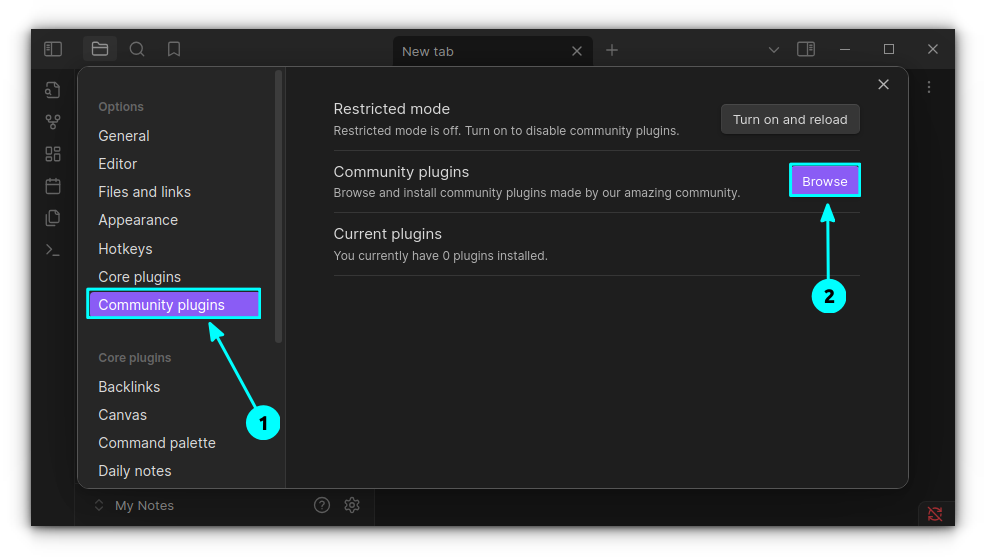
Use the Browse button to go to the plugins page, as shown in the screenshot above. You will reach the plugins store, that lists 2000+ plugins.
Do not worry about the numbers, just search for what you need, or browse through some suggested options, just like I did.
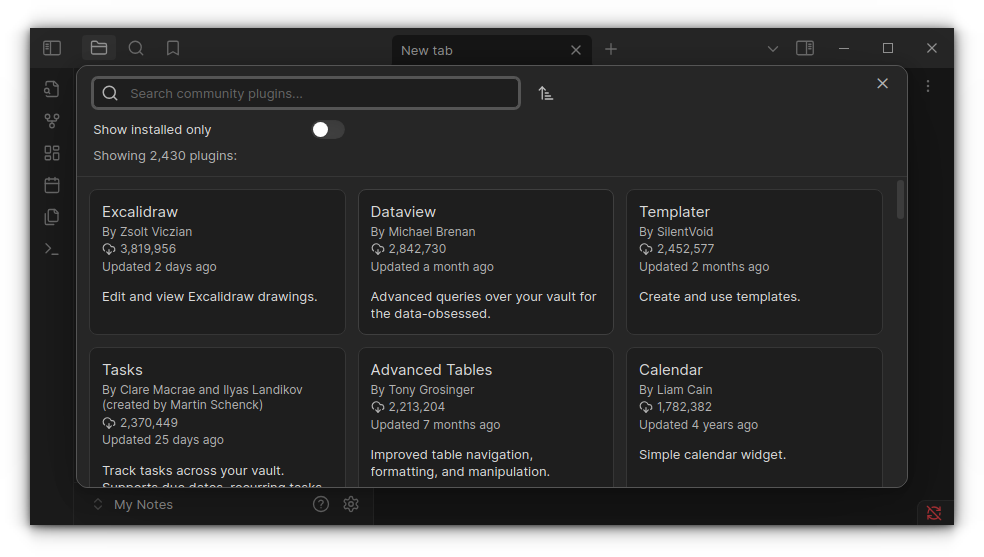
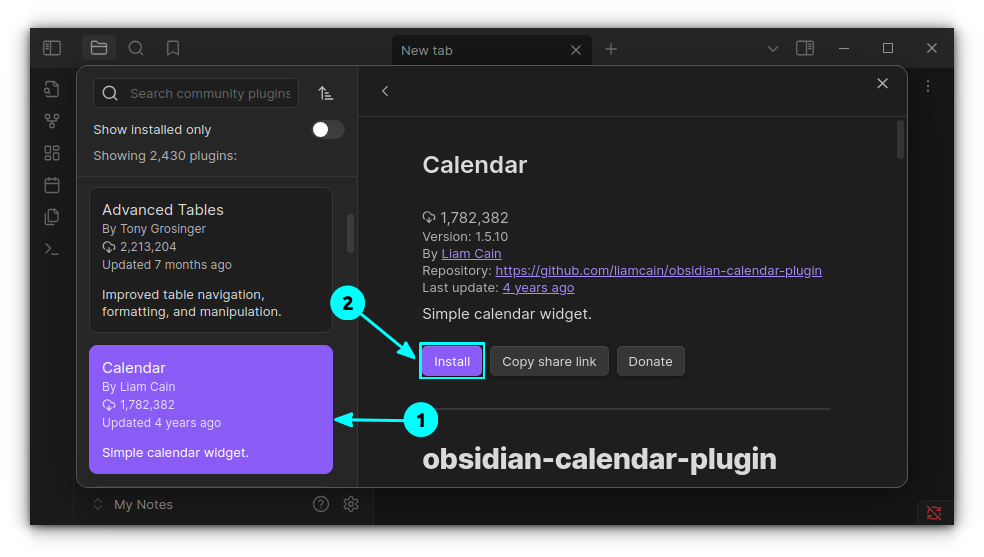
When you have spotted a plugin that matches your need, click on it. Now, to install that plugin, use the Install button.
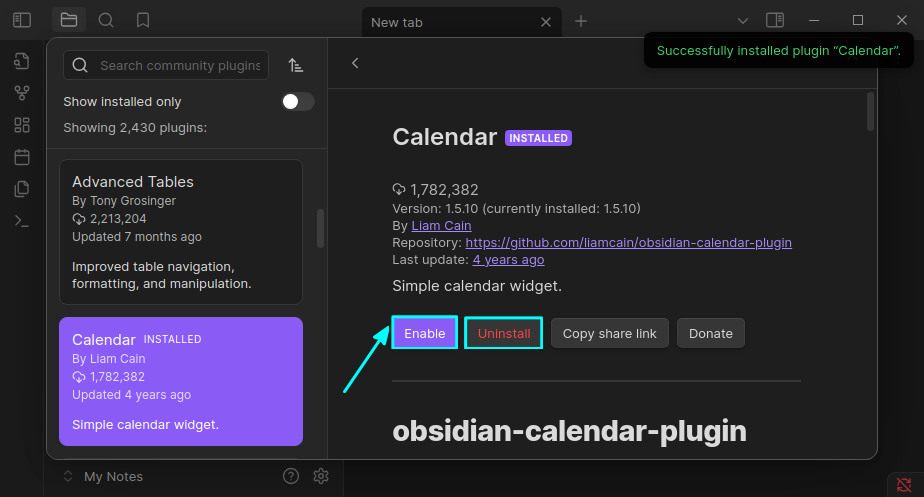
Once installed, you can see two additional buttons called Enable and Uninstall. As the name suggests, they are for enabling a plugin or uninstalling a plugin.
This can be done more efficiently from the Obsidian settings. For this, go to the Settings → Community plugins → Installed plugins. Here, use the toggle button to enable a plugin.
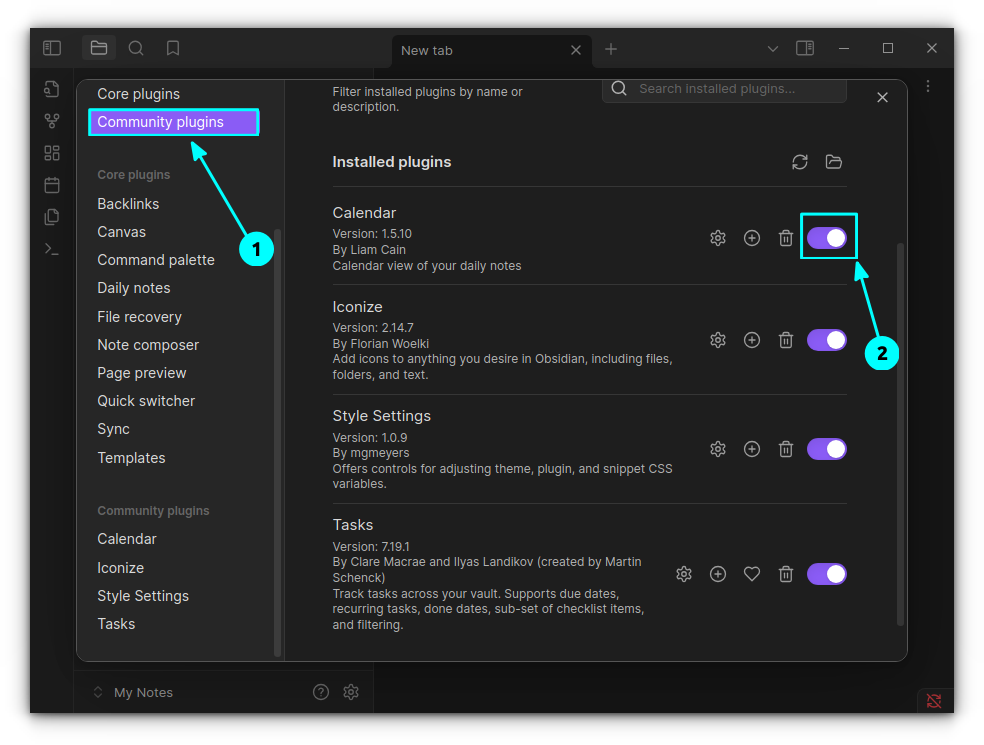
This section lists all the installed community plugins. You can enable/disable, uninstall, access plugin settings, assign a keybinding, or donate to that particular plugin.
Manually install plugins
Even though not recommended, if you want to install a plugin, manually, for version compatibility or other personal reasons, make sure to source it from the official repositories or websites.
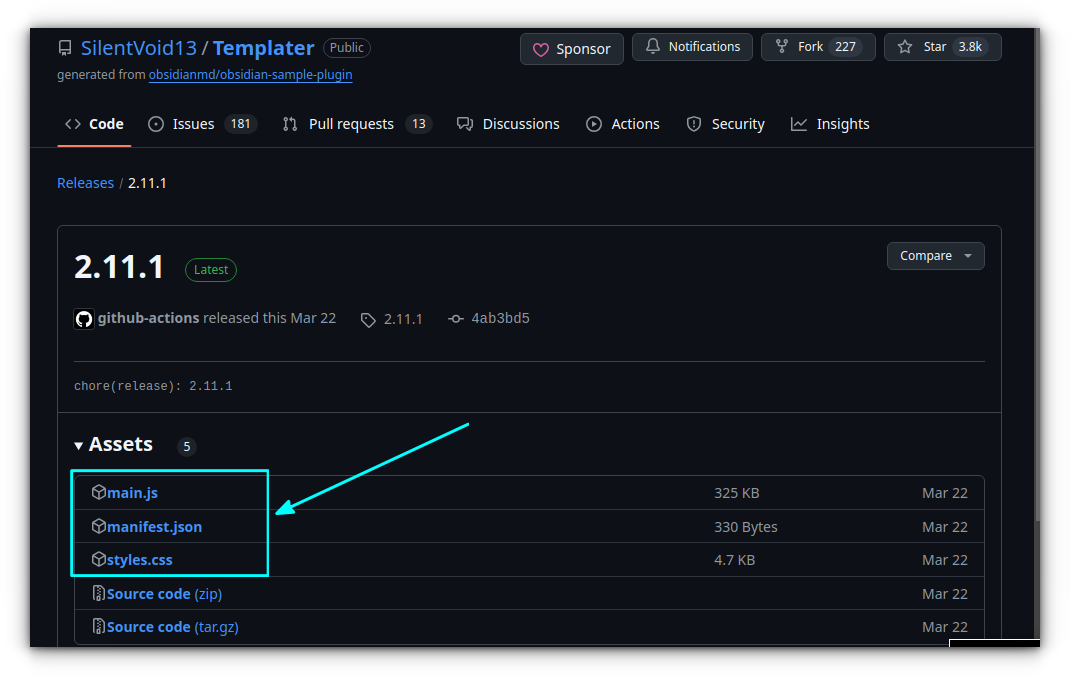
If it is on GitHub, go to the release page of the plugin GitHub repository and download main.js, manifest.json, and style.css files.
Now, create a directory with the name of the project in the <Your-obsidian-vault>/.obsidian/plugins directory. Press CTRL+H to view hidden files.
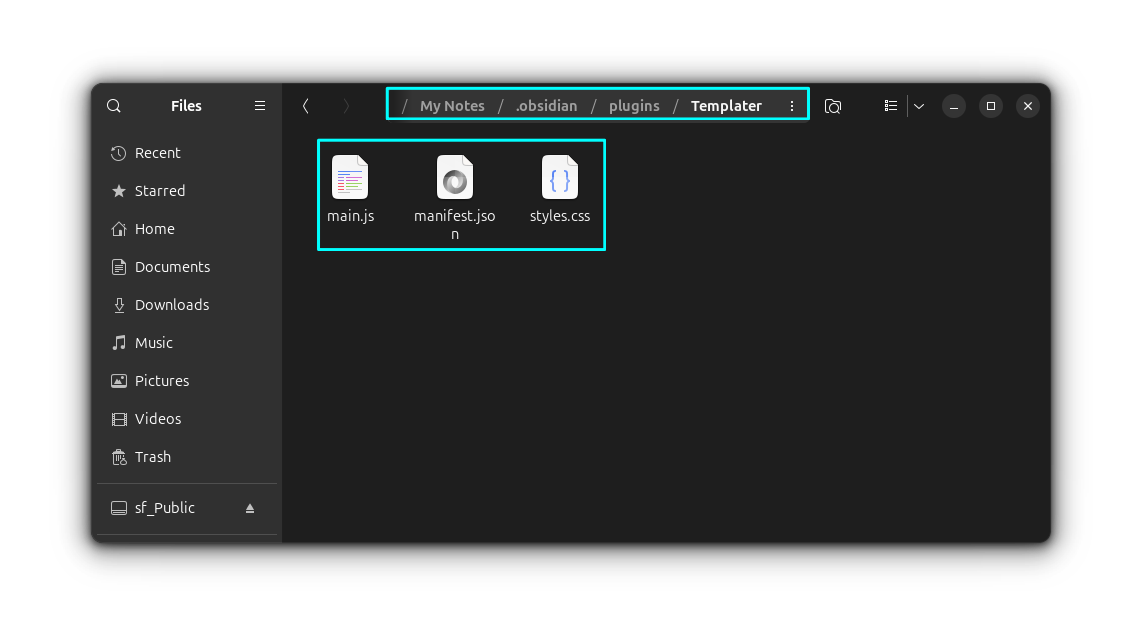
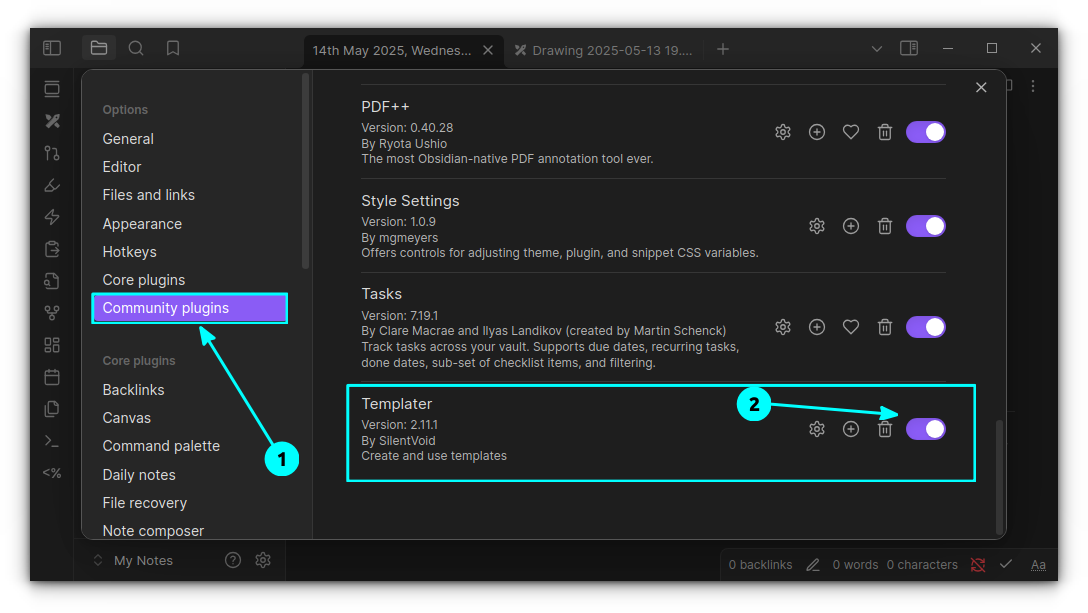
In my case, I tried Templater. Next, I transfer the downloaded files to this project directory. Now, open Obsidian and go to the Settings → Community plugins and enable the new plugin.
Install beta version of plugins
This is not for regular users, but for those who want to be testers and reviewers of beta plugins. I usually do this to test interesting things or help with the development of plugins I believe in.
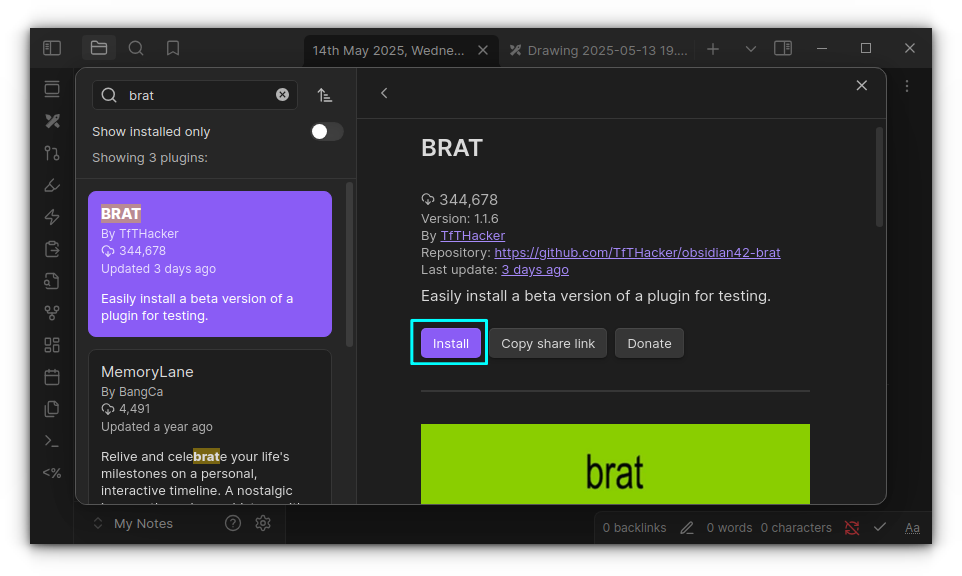
We are using the BRAT (Beta Reviewers Auto-Update Tool) to install and update beta versions of Obsidian plugins.
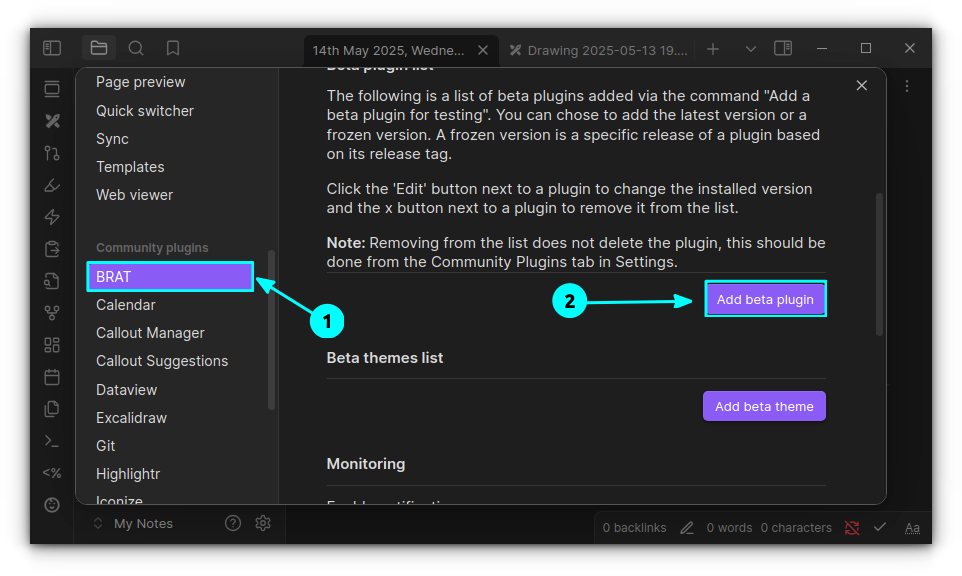
First, install the BRAT plugin from the Obsidian plugins store and enable it.
Now, go to the GitHub repository of the plugin you want to install the beta version of. Copy the URL of the repository.
Select the BRAT plugin from Settings → Community plugins and click on the “Add beta plugin” button.
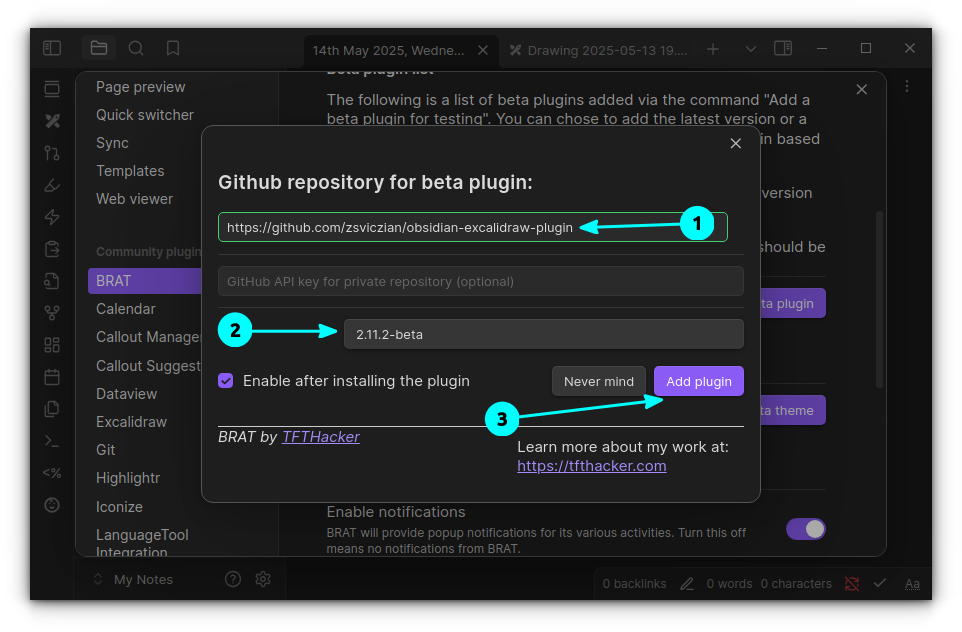
Here, add the GitHub URL, select a version from the list, and click on the Add Plugin button.
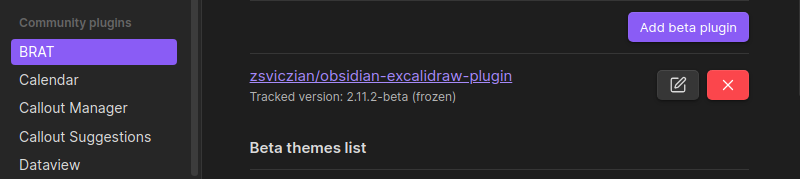
You can see that the plugin has been added with BRAT. Since we selected a specific version, it is shown as frozen and cannot be updated. Select Latest as version to get updates.
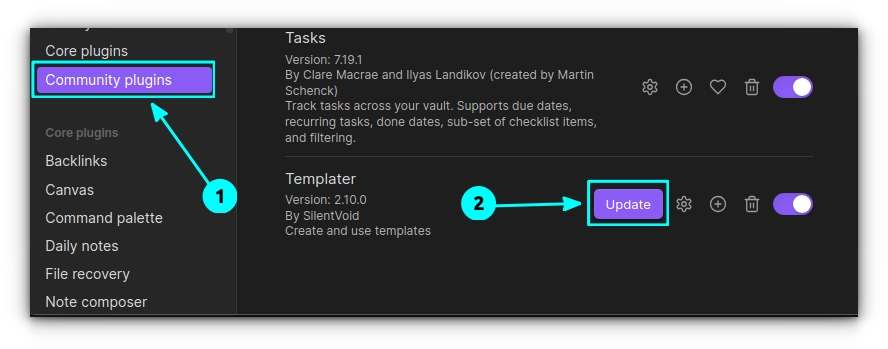
Update plugins
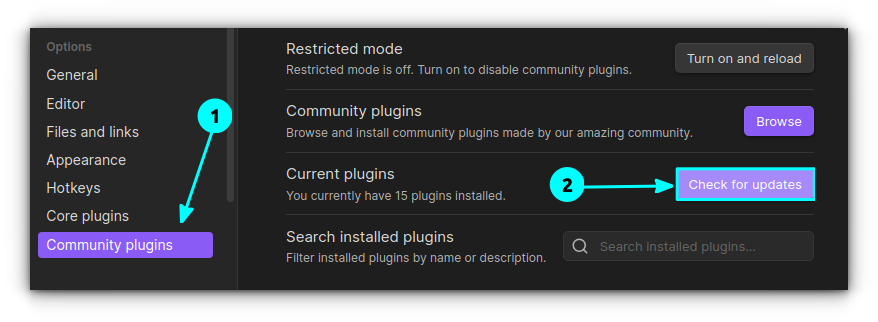
To update community plugins, go to Obsidian settings and select Community plugins.
Here, click on the Check for updates button.
If there is an update available, it will notify you.
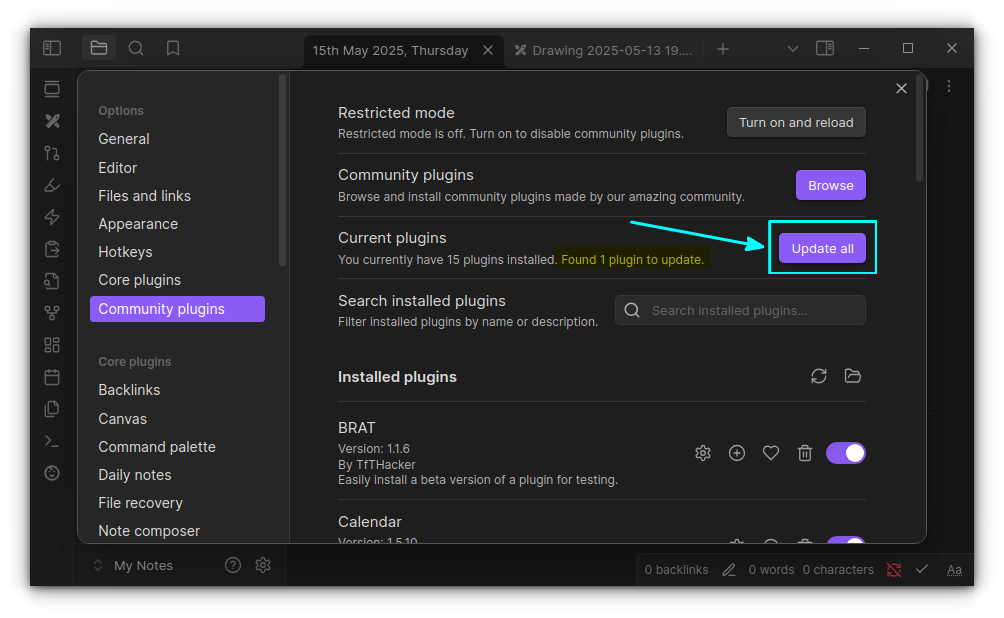
Click on Update All to update all the plugins that have an update available. Or, scroll down and update individual plugins by clicking on the Update button.
Move community plugins
You can copy selected or all plugins from your directory to another vault to avoid installing everything from scratch.
Go to the <your-obsidian-vault>/.obsidian/plugins directory. Now, copy directories of those plugins you want to use in another vault.
Copy those directories to your new plugin directory for your other vault (or the newer vault) <your-new-vault>/.obsidian/plugins directory.
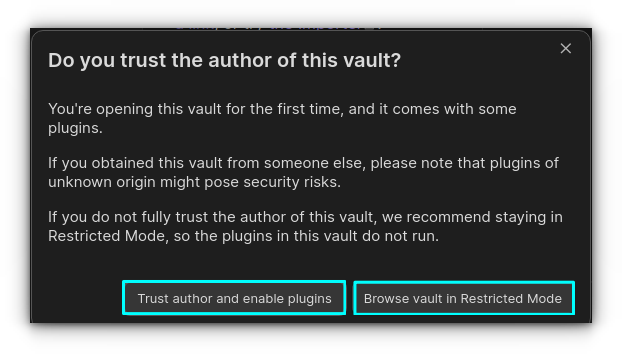
If there is no plugins directory in the new vault, create one. Once you open the new vault, you will be asked to trust the plugins.
If it is you, who copied all the folders and no others are involved, click on the “Trust author and enable plugins” button.
Or you can use the “Browse Vault in restricted mode” and then enable the plugins by going to Settings → Community plugins → Turn on Community plugins → Enable plugins.
In both cases, you don’t have to install the plugin from scratch.
Don’t forget to enable the plugins through Settings → Community plugins to start using them.
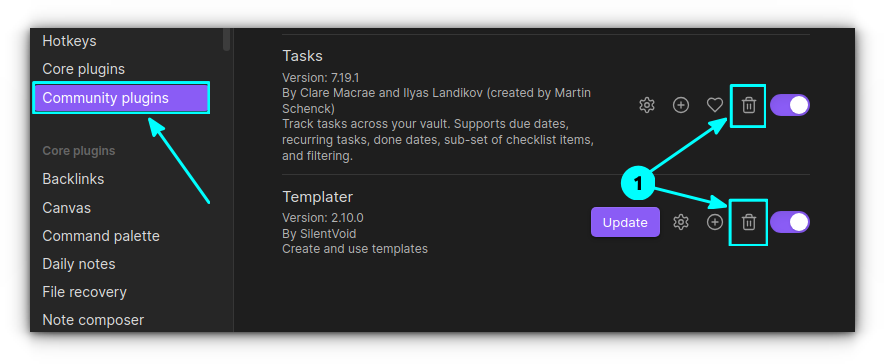
Remove a plugin
Removing a plugin is easy. Go to the community plugins in settings and click on the delete button (bin icon) adjacent to the plugin you want to remove.
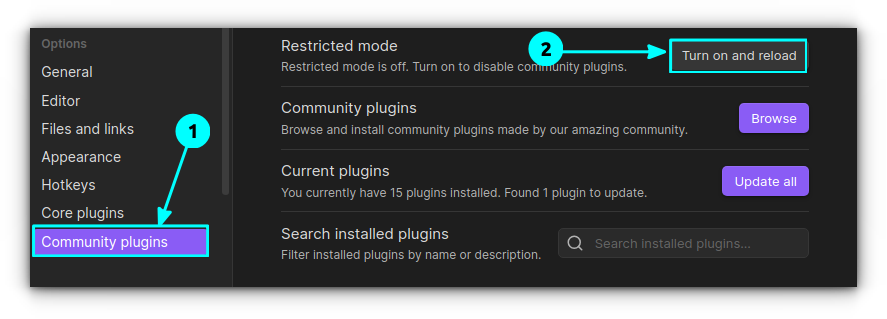
Or, if you just want to disable all community plugins, you can turn on the restricted mode. Click on the Turn on and reload button in community plugins settings.
So, if you turn off the restricted mode, all the installed plugins will be enabled. Pretty easy, I know, right?
Another way to remove plugins is to delete specific folders in the plugins directory, but it is unnecessary unless you are testing something specific.
Go to the <your-obsiidian-vault>/.obsidian/plugins directory and remove the directory that has the name of the plugin you want to remove.
Now open Obsidian and you won’t see that plugin. Voila!
Enjoy using Obsidian
I have shared many more Obsidian tips to improve your experience with this wonderful too.

Plugin is just part of how you can go beyond the obvious and default Obsidian offering. I hope you found this tutorial helpful. Enjoy.
Source: Read More

